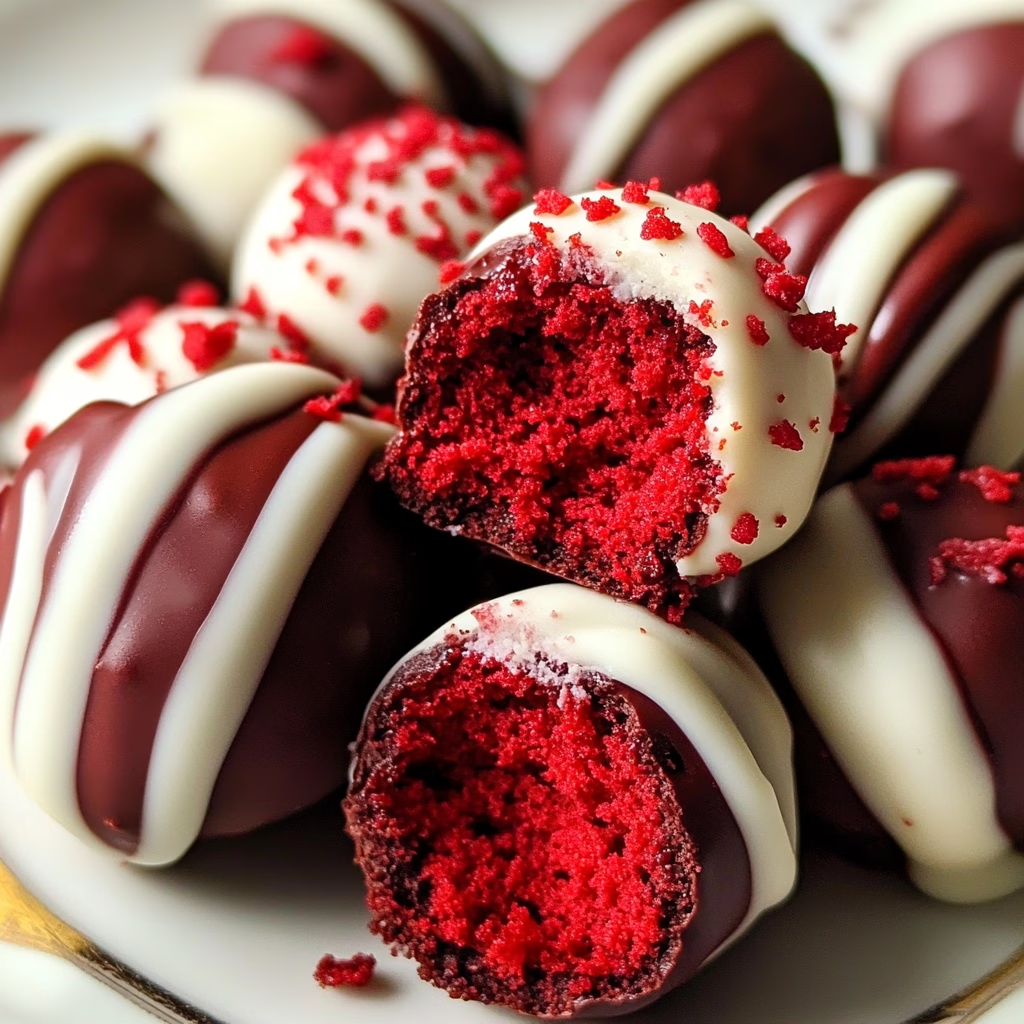
Ah, Red Velvet Cake Truffles! Where do I even begin? This delicious treat has a special place in my heart—every time I make them, I am instantly transported back to cozy gatherings with friends and family, or those blissful afternoons where I’d whip up something sweet to indulge in. There’s something magical about the vibrant red hue and the rich flavor that makes these truffles perfect for any occasion; whether it’s a potluck, a birthday party, or simply a late-night snack, they never fail to delight.
Now, let me tell you, creating these little bites of joy is simpler than you might think! The first time I made these, I was convinced they would end up in a gooey disaster, but they turned out beautifully! The combination of fluffy red velvet cake with a creamy frosting center, all coated in smooth chocolate is pure heaven. And let’s be real, who doesn’t love a good chocolate drizzle and a sprinkle of colorful fun?
What’s in Red Velvet Cake Truffles?
Let’s break down what goes into these delightful truffles.
Red Velvet Cake Mix: This is the star of the show! The richness and slight chocolate flavor of the red velvet cake mix are what make these truffles so irresistible. I usually go with whatever brand is available, as they all deliver that classic taste.
Eggs: These help bind the cake mix together and add moisture. I prefer using large, fresh eggs.
Vegetable Oil: A classic choice for moist cakes! It helps keep the cake from drying out. I often go for canola or a light olive oil, but vegetable oil works perfectly.
Water: Just plain old water to help combine all those wonderful ingredients together.
Cream Cheese Frosting: This is where the magic happens! The tangy sweetness of cream cheese frosting complements the red velvet perfectly. I sometimes whip up a quick homemade version, but I’ve found that store-bought works just as well for a quicker treat.
Semi-Sweet Chocolate: This is the chocolate coating that brings it all together. I usually go with a good quality semi-sweet variety as it balances perfectly with the sweetness of the cake.
White Chocolate: Used for drizzling on top for that luxurious finish! I love using high-quality chopped white chocolate that melts beautifully.
Sprinkles: Optional, but they add a festive touch! I’m all about making things a little more fun.
Is Red Velvet Cake Truffles Good for You?
Now, let’s chat about health! These truffles, while certainly decadent, can certainly fit into a balanced lifestyle if enjoyed in moderation. They make for a great dessert or snack, but it’s always important to remember:
Cake Mix: Pre-packaged mixes can sometimes contain more sugar and preservatives than homemade options. If you want to control those ingredients, whip up a homemade red velvet cake!
Cream Cheese Frosting: This adds flavor, but it’s richer in sugar and fat. Consider using a lighter version or reducing the amount if you want to keep it on the healthier side.
Chocolate Coating: While chocolate does have some antioxidant benefits, the coating adds additional calories. Opting for a darker chocolate can be a healthier choice, as they typically contain higher cocoa content and less sugar.
So go ahead! Enjoy these delightful little treats, but maybe not the whole batch in one sitting!
Ingredients
– 1 box (15.25 oz) red velvet cake mix
– 3 large eggs
– 1 cup vegetable oil
– 1 cup water
– 1/2 cup cream cheese frosting (store-bought or homemade)
– 8 oz semi-sweet chocolate, chopped (for coating)
– 4 oz white chocolate, chopped (for drizzle)
– Sprinkles (optional, for decoration)
Serves: About 24 truffles, depending on size.
How to Make Red Velvet Cake Truffles?
1. **Bake the Cake**: Preheat your oven to 350°F (175°C). Prepare the red velvet cake mix according to the package instructions, combining the mix with eggs, oil, and water. Bake in a greased 9×13 inch pan for about 30-35 minutes, or until a toothpick inserted in the center comes out clean.
2. **Cool the Cake**: Allow the cake to cool completely in the pan on a wire rack.
3. **Crumble the Cake**: Once cooled, crumble the cake into a large bowl until it resembles fine crumbs. Be sure there are no large chunks.
4. **Mix in Frosting**: Add the cream cheese frosting to the cake crumbs. Use your hands or a spatula to mix until the frosting is fully incorporated and the mixture can be easily formed into balls.
5. **Form Truffles**: Scoop small portions of the mixture and roll them into balls, about 1 inch in diameter. Place the cake balls on a baking sheet lined with parchment paper. Once all are rolled, place the baking sheet in the refrigerator for about 1 hour to help firm them up.
6. **Melt Chocolate**: In two separate bowls, melt the semi-sweet chocolate and white chocolate (for drizzle) in the microwave in 30-second intervals, stirring until completely smooth.
7. **Coat the Truffles**: Dip each cake ball into the melted semi-sweet chocolate, coating completely, then place them back on the parchment paper. Repeat until all truffles are dipped.
8. **Drizzle White Chocolate**: Once the chocolate coating has set but is still slightly tacky, drizzle the melted white chocolate over the truffles using a fork or a piping bag for precision.
9. **Chill and Serve**: Let the truffles set completely in the fridge for about 30 minutes. Serve chilled or at room temperature, and enjoy your delicious red velvet cake truffles!
Sweet Tricks for Delectable Truffles
– If you’re running short on time, using a store-bought frosting is an absolute lifesaver! No need to make it from scratch unless you want to try out a unique flavor.
– Feeling adventurous? Try adding some chopped nuts or mini chocolate chips into the cake mixture for added texture!
– When decorating with sprinkles, apply them right after the drizzle to ensure they stick well!
– Keep them stored in a cool place, or they can get a bit melty if your kitchen runs warm— but honestly, what’s there to worry about? You’ll probably finish them in no time!
I promise you, once you receive those compliments from friends and family, you will be proud of the delicious truffles you’ve created! So, roll up your sleeves, get your apron on, and dive into this indulgent adventure. I can’t wait for you to try it, and I’d love to hear how yours turn out! Happy baking!


