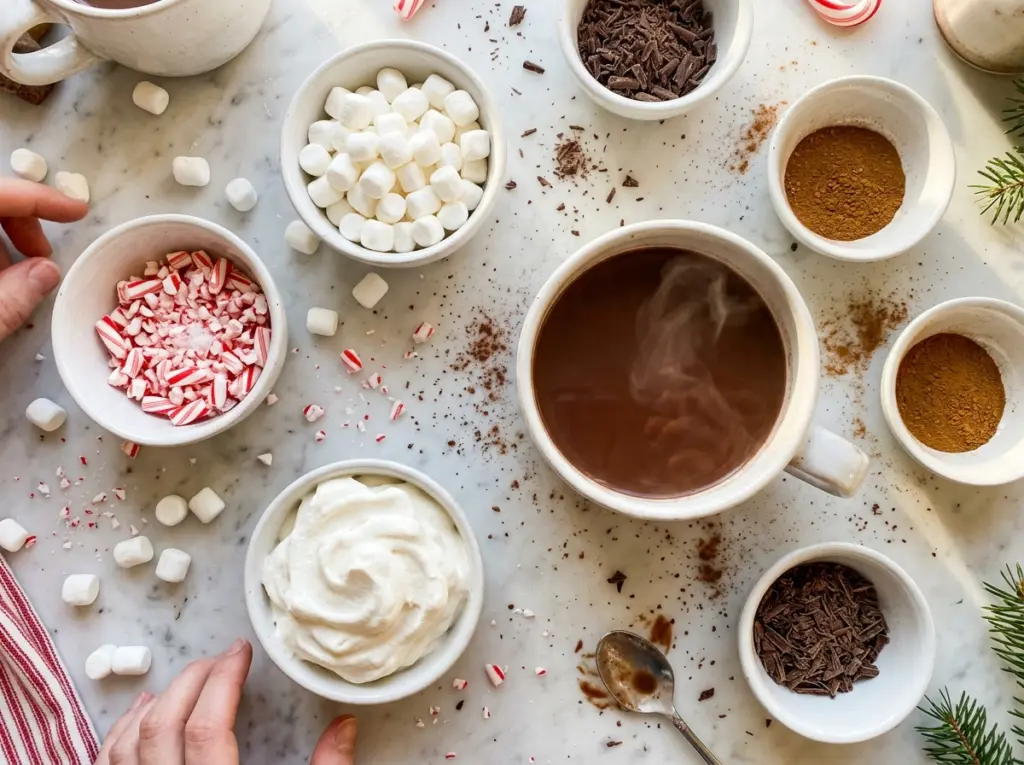
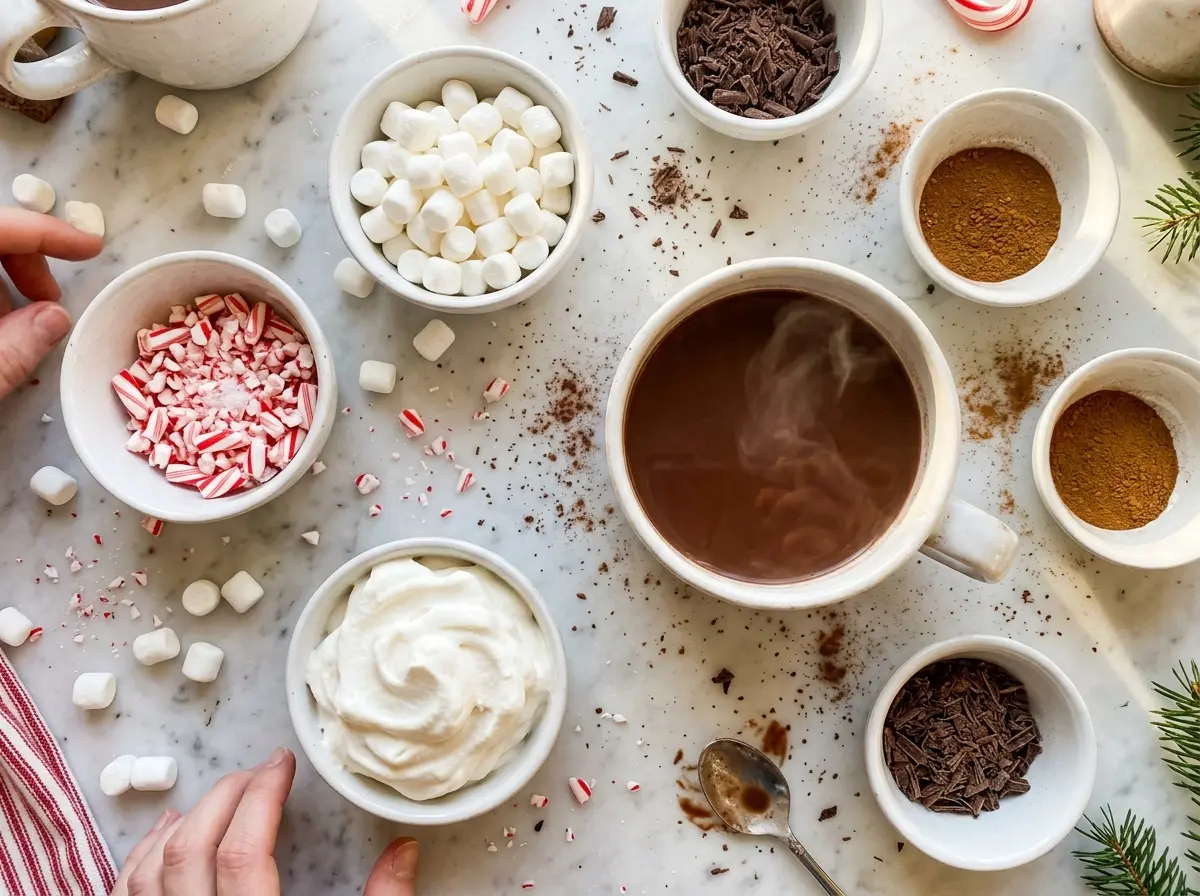
The milk should be steaming, not bubbling, and the chocolate chips disappear into it with a few minutes of whisking. That’s the moment this Christmas Hot Cocoa Bar starts to feel like more than a pot of cocoa: everyone gets a warm mug, then chooses the toppings they actually want.
I make the cocoa on the stovetop in one saucepan, then set out the toppings in separate bowls. The cocoa itself stays smooth and chocolatey, while crushed candy canes, mini marshmallows, whipped cream, and sprinkles let each mug take a different turn. Since the batch serves eight, it’s an easy way to put out something warm without asking everyone to drink it the same way.
There’s no need to boil the milk or fuss with a complicated chocolate base. Whisk the cocoa mixture smooth first, warm it gently, and let the semisweet chips melt right into the milk. You end up with a rich, pourable cocoa that’s ready for a cloud of whipped cream or a shower of candy cane pieces.
Kitchen Note
I stir the vanilla in only after the saucepan comes off the heat. That keeps its aroma bright instead of cooking it away while the cocoa warms.
Save this Christmas Hot Cocoa Bar for a cozy cocoa spread with creamy mugs and candy cane, marshmallow, and sprinkle toppings.
Why This Cocoa Should Steam, Not Boil
Boiling might seem like a shortcut when you’re warming a full saucepan of milk, but it’s not needed here. The milk only needs to get hot enough to give the cocoa and chocolate a smooth, silky base. A rolling boil can make milk foam up quickly and catch on the bottom of the pan, which is a distraction you don’t need when you’re trying to keep the cocoa even.
Watch the surface as the saucepan warms. You want visible steam and a hot pot, without the vigorous bubbles of a boil. Stirring often helps distribute the heat through all eight cups of milk, rather than letting the bottom warm much faster than the top. Once the chocolate chips go in, they need only a couple of minutes to melt; keeping the heat gentle gives you time to whisk them in without scorching the milk. The result pours easily and stays smooth, rather than tasting cooked or developing a scorched note.
Why the Cocoa Paste and Semisweet Chips Matter

- Unsweetened cocoa powder — It brings the deep cocoa flavor without adding more sweetness. A fresh, standard grocery-store cocoa works well; pick one you enjoy drinking, because its flavor comes through clearly.
- Granulated sugar — Sugar dissolves into the small milk-and-cocoa mixture and balances the bitterness of the cocoa. The chocolate chips contribute sweetness too, so leaving the sugar out makes a less-sweet, more bittersweet pot.
- Whole milk — Whole milk gives this drink a fuller, creamier body. A lower-fat milk would make a thinner cup, so whole milk is the best fit when you want the rich texture of this version.
- Semisweet chocolate chips — The chips melt into the warm milk and make the cocoa taste rounder and more chocolate-forward than cocoa powder alone. Use semisweet chips for the intended sweetness; a premium brand isn’t necessary, but choose chips you like to eat.
- Vanilla extract — A little vanilla softens the cocoa’s sharper edges. Keep it with the other finishing ingredients and stir it in off the heat rather than cooking it along with the milk.
- Crushed candy canes and holiday sprinkles — These give the topping bar its bright, festive finish. Choose the candy cane pieces when you want a minty, crunchy topping, or reach for sprinkles for color without adding mint.
- Mini marshmallows and whipped cream — These bring two different finishes: marshmallows soften into a mug as they sit, while whipped cream makes a cool, airy cap. Set them out separately so each person can choose one or both.
Building the Cocoa Without Lumps or Scorched Milk
Whisk the Cocoa Into a Smooth Base
Add the sugar, cocoa powder, kosher salt, and one cup of milk to a 4-quart saucepan. Whisk until the mixture looks smooth and no dry cocoa patches cling to the sides. Starting with just this portion of milk gives you enough control to work out the cocoa before the rest of the liquid goes in. If you see little dry pockets, keep whisking now rather than trying to break them up in the full pot.
Warm the Milk Until It Steams
Whisk in the remaining milk, then set the saucepan over medium-low heat. Stir often for 8 to 10 minutes, scraping around the bottom so the milk heats evenly. Look for steam rising from the surface; the cocoa should be hot but not boiling. If bubbles start rolling across the top, lower the heat and keep stirring.
Melt the Chips and Finish With Vanilla
Add the semisweet chocolate chips and whisk for 2 to 3 minutes, until every chip has melted into the milk. A few small swirls of darker chocolate may appear as you start, but they should disappear as you whisk. Remove the saucepan from the heat, then stir in the vanilla. The finished cocoa should look glossy and pour smoothly from the pan.
Set Out the Toppings
Arrange the mini marshmallows, whipped cream, crushed candy canes, and holiday sprinkles in separate serving bowls. Keeping them apart lets the mint and crunch stay in the toppings instead of taking over the whole pot. Pour the hot cocoa into mugs and bring the bowls to the table. Each person can finish a mug with the combination they like.
Three Ways to Change Up the Cocoa Bar
A Less-Sweet Pot
Leave out the granulated sugar if you prefer a more bittersweet cocoa. The semisweet chips still sweeten the milk, but the finished drink will taste less sugary and let the cocoa stand out more.
Mint in Every Sip
Stir crushed candy cane into an individual mug instead of leaving all of it on top. The mint and sweetness spread through the cocoa, and the candy softens as it sits; keep the rest of the batch plain for anyone who wants a classic chocolate cup.
Marshmallows Melted Into the Mug
Stir mini marshmallows into a freshly poured mug and let them soften before drinking. They make the surface sweeter and softer than a dry marshmallow topping, though they’ll lose their shape as they melt.
Storage and Reheating
- Refrigerator: Refrigerate leftover cocoa in a covered container within 2 hours and use it within 3 to 4 days. It may thicken as it chills, and the chocolate can settle.
- Freezer: Freezing isn’t my first choice for this milk-based cocoa; thawing can leave the texture separated or grainy.
- Reheating: Warm it gently in a saucepan over low heat, whisking until smooth and steaming. Don’t let it boil, which can scorch the milk and change the texture.
Questions That Come Up While Setting Out the Cocoa
Christmas Hot Cocoa Bar
Ingredients
Equipment
Method
- In a 4-quart saucepan, whisk the sugar, cocoa powder, salt, and 1 cup of the milk until smooth.
- Whisk in the remaining 7 cups milk and heat over medium-low, stirring often, for 8 to 10 minutes, until steaming but not boiling.
- Add the chocolate chips and whisk for 2 to 3 minutes, until completely melted.
- Remove the pan from the heat and stir in the vanilla.
- Arrange the marshmallows, whipped cream, crushed candy canes, and sprinkles in separate serving bowls.
- Pour the hot cocoa into mugs.
- Serve the cocoa with the toppings.