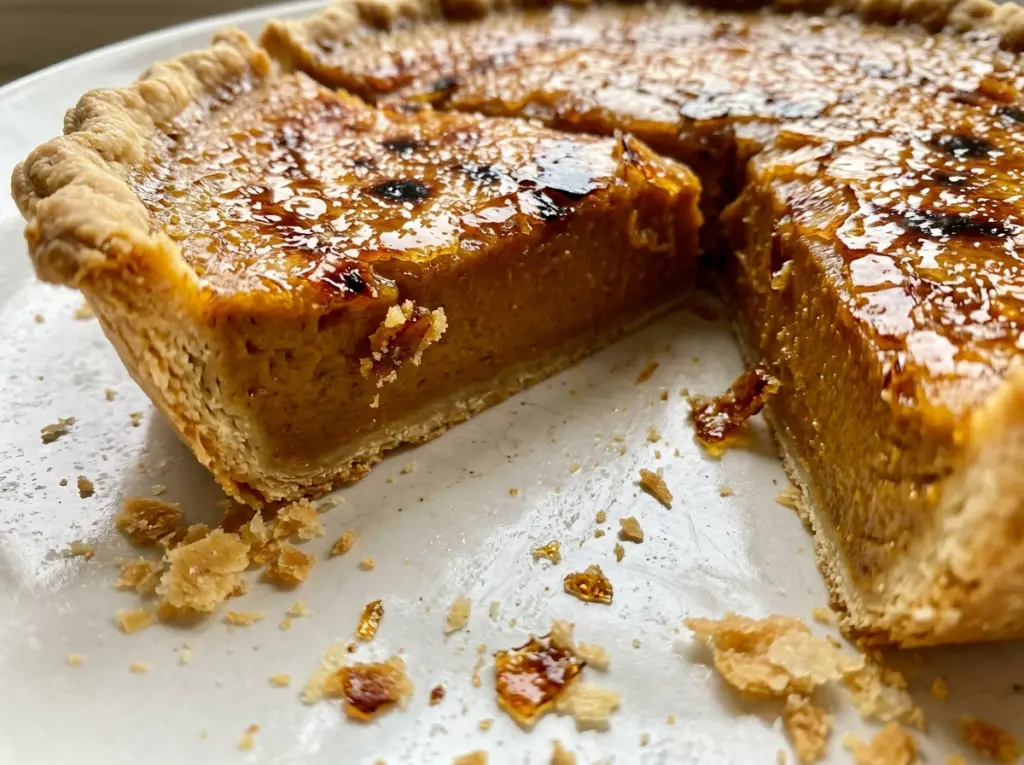
When the parchment and pie weights come out, the crust still needs five more minutes in the oven. That short second bake dries the bottom, which matters when you’re filling it with a soft pumpkin custard. It’s the difference between a slice that holds together and one with a damp, fragile layer underneath.
This Creme Brulee Pumpkin Pie brings the familiar cinnamon-and-pumpkin filling together with a thin, crackly sugar top. I keep the filling simple: pumpkin puree, brown sugar, eggs, and evaporated milk, whisked smooth and baked until the center has only a slight wobble. After a long chill, the sugar gets caramelized just before serving, so each slice has a crisp top and cool, creamy filling.
Kitchen Note
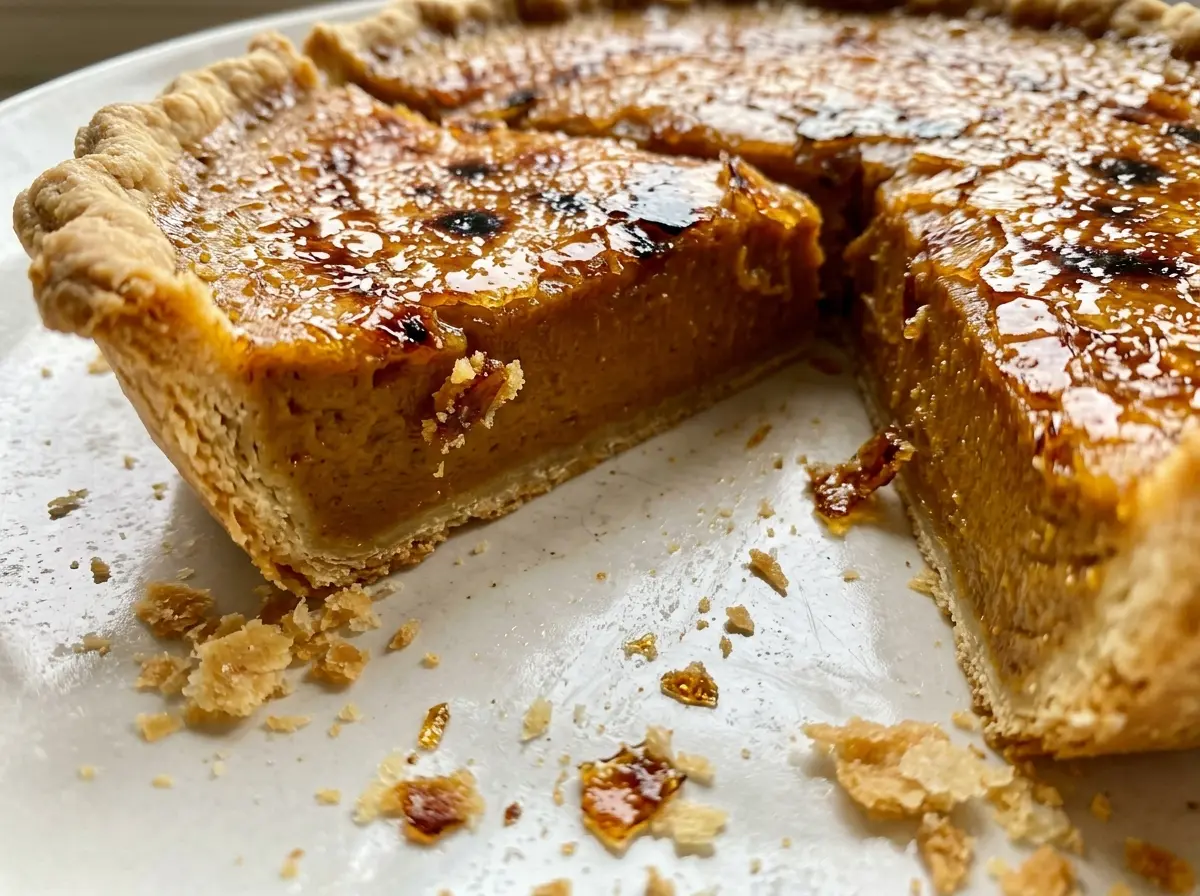
Keep the torch moving across the sugar instead of lingering over one spot. The topping needs an even pass so it caramelizes across the pie rather than scorching in patches.
Save this Creme Brulee Pumpkin Pie for its cool pumpkin custard and crisp, caramelized sugar top.
Why the Center Should Still Wobble When the Pie Leaves the Oven
Pumpkin pie filling is a custard, not a cake. The eggs help it set, but the center firms as the pie cools; waiting for the whole surface to look solid in the oven can leave the filling overbaked. A slight wobble in the middle is the cue to stop, not a sign that the pie needs more time.
That gentle finish matters even more here because the pie needs a thorough chill before the sugar goes on. Cooling and refrigerating give the custard time to settle into a sliceable texture, while the brûlée topping supplies the crisp contrast. If you chase a completely firm center in the oven, you lose some of that smooth, creamy texture.
Think of the two finishes as separate jobs: bake the filling until its edges are set, then let the refrigerator finish firming the center. The thermometer reading is a useful check when you’re unsure, but the slight movement in the middle is still easy to spot once you know to look for it.
What the Pumpkin, Evaporated Milk, and Sugar Each Bring

- Pumpkin puree — Use plain canned puree, not pumpkin pie filling. The pie filling is already sweetened and spiced, so it would throw off the balance of the brown sugar and measured spices. A standard canned puree is a practical choice here; whisk it smooth before adding the eggs and milk.
- Evaporated milk — It gives the filling its creamy custard texture without adding the sweetness of condensed milk. Those cans aren’t interchangeable: sweetened condensed milk would make this filling much too sweet and change how it sets.
- Light brown sugar — Packed brown sugar sweetens the pumpkin and adds a mellow molasses note that granulated sugar alone wouldn’t bring. Break up any hard lumps before whisking so they don’t linger in the filling.
- Eggs — Eggs help the filling set as it bakes and chills. Whisk them in after the pumpkin and brown sugar are smooth; a smooth starting mixture makes it easier to combine the remaining ingredients evenly.
- Cinnamon, ginger, and nutmeg — Together, these give the pumpkin its warm spice without relying on pre-seasoned pie filling. Ground spices are what this method uses, so there’s no extra step for toasting or grinding.
- Granulated sugar — The brûlée topping needs plain granulated sugar to melt under the torch and harden into a crisp layer. It’s added only when you’re ready to serve, not mixed into the filling.
- Refrigerated pie crust — A refrigerated 9-inch crust keeps the pastry step straightforward and fits the specified pie plate. Let it soften enough to fit and crimp, then freeze it before blind-baking so it’s firm when it goes into the oven.
From a Dry-Baked Crust to a Crisp Brûlée Lid
Fit the Crust, Then Firm It in the Freezer
Fit the refrigerated crust into a 9-inch pie plate and crimp the edge, then freeze it for 15 minutes. That quick chill firms the pastry before the first bake. Set out the parchment and pie weights while the oven heats to 400°F, so they’re ready to use as soon as the crust comes out of the freezer.
Blind-Bake Until the Bottom Looks Dry
Line the chilled crust with parchment and fill it with pie weights. Bake for 15 minutes, then carefully remove the parchment and weights and bake for 5 minutes more. Look for a dry-looking crust before you take it out; a pale, damp-looking bottom needs that second bake rather than an early filling.
Whisk the Filling Smooth and Watch for the Wobble
Reduce the oven to 350°F and let the crust cool for 10 minutes. Whisk the pumpkin and brown sugar until smooth, then whisk in the eggs, evaporated milk, vanilla, cinnamon, ginger, nutmeg, and salt; pour the filling into the crust. Bake for 45–55 minutes, until the edges are set and the center has a slight wobble. If you check with an instant-read thermometer, insert it near the center and look for 175°F.
Chill Thoroughly Before Torching the Sugar
Cool the pie on a wire rack for 1 hour, then refrigerate it uncovered for at least 4 hours, until thoroughly chilled. Add the granulated sugar evenly over the pie just before serving, then caramelize it with a kitchen torch while keeping the flame in motion. Give the topping 5 minutes to harden before slicing; cutting sooner can break the fresh sugar shell.
Two Ways to Adapt the Crust or the Sugar Top
Use a Refrigerated Gluten-Free Crust
Choose a refrigerated gluten-free pie crust sized for a 9-inch plate and use it in place of the regular crust. Keep the same filling and blind-baking sequence; gluten-free pastry can be more delicate to crimp and slice, but the pumpkin custard and brûlée top stay the same.
Serve It as a Classic Pumpkin Custard Pie
Leave off the granulated sugar topping if you want the familiar pumpkin pie finish without a brittle caramel layer. The filling stays the same, but you’ll miss the contrast between the creamy custard and the crisp brûlée shell.
Storage and Reheating
- Refrigerator: Keep the pie covered and refrigerated for 3–4 days. The brûlée sugar will gradually soften as it sits.
- Freezer: Freeze the chilled pie before adding the sugar topping. Wrap it tightly and freeze for up to 1 month; thaw it in the refrigerator, then brûlée the top just before serving.
- Reheating: Serve this pie chilled rather than warmed. Don’t microwave it, since heat softens the custard and won’t restore a crisp sugar top.
Questions That Come Up While Making Creme Brulee Pumpkin Pie
Creme Brulee Pumpkin Pie
Ingredients
Equipment
Method
- Heat the oven to 400°F.
- Fit the crust into a 9-inch pie plate and crimp the edge.
- Freeze the crust for 15 minutes.
- Line the crust with parchment and fill with pie weights; bake for 15 minutes.
- Remove the parchment and weights, then bake for 5 minutes more until the crust looks dry.
- Reduce the oven to 350°F.
- Let the crust cool for 10 minutes.
- Whisk the pumpkin and brown sugar until smooth.
- Whisk in the eggs, evaporated milk, vanilla, cinnamon, ginger, nutmeg, and salt.
- Pour the filling into the crust.
- Bake for 45–55 minutes, until the edges are set and the center has a slight wobble; an instant-read thermometer inserted near the center should read 175°F.
- Cool the pie on a wire rack for 1 hour.
- Refrigerate uncovered for at least 4 hours until thoroughly chilled.
- Just before serving, sprinkle the granulated sugar evenly over the pie.
- Caramelize the sugar with a kitchen torch, moving the flame constantly.
- Let the topping harden for 5 minutes.